

Hi Twiddley fans!
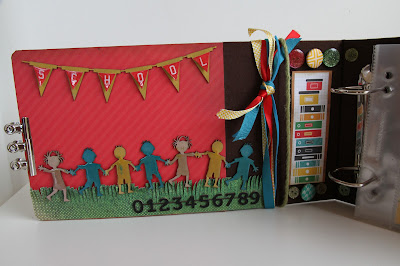
Charlene here to guide you through creating a fabulous texture book cover using the
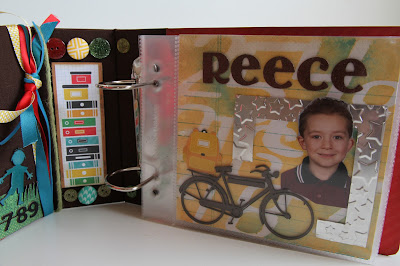
Twiddleybitz Numbers Stencil. I have used mine to house my son's special
school memories in.
school memories in.

Numbers
Template Tutorial
By
Charlene Camilleri
You
will need:
Twiddleybitz
Numbers Stencil
American
Crafts 8x6 Album
Impasto
Paint
colour of your choice
Artist
Palette knife
Kindy
Glitz- Stickles
White
Paint or Gesso
Lindy's
Stamp Gang Spray
Step
1
Paint
the chipboard cover with the white paint/gesso. This gives a nice
surface to work with. Use a heat gun to dry.


Step
2
You
will need two different small containers for mixing the impasto.
Place about 1 tbsp impasto and 1tbsp of your desired paint colour
into each and mix well. I used Lumiere Pearl Turquoise & Metallic
Rust.

Step
3
Carefully
place your numbers stencil over the painted cover and hold down
firmly with one hand whilst you use the palette knife to apply one of
the coloured impasto randomly over the stencil. You don't need to
completely cover the stencil with the first colour. Be careful not to
move the stencil whilst applying the impasto. Once you spread a bit
over, it tends to act like a glue and secure the stencil in place.
Apply
the second colour over the rest of the stencil, making sure you get
right to the edge and there are no gaps. You should now have a
beautiful two toned effect over the whole stencil. It's a bit like
icing a cake!
Starting
at the top corner very very carefully lift the stencil off to reveal
your pattern.


Step
4
Spritz
liberally over the cover with Lindy's Stamp Gang California Poppy
Gold. Use a heat gun and focusing mainly on the number dry the spray.
You don't want to heat the actual impasto too much as it may crack.


Step
5
Apply
kindy glitz/stickles to the numbers in the colours you desire. Leave
no gaps. Set aside to dry- this will take a while!
Once
touch dry, paint the edge of the album cover then you can embellish
the rest of your album cover as you wish. I used the papers from the
new Kaiser Class Act range. Enjoy your new album!!


I hope you have enjoyed this tutorial and that you have learnt something new. Happy creating!
Charlene
That's a fun project, like the way you have used the stencil
ReplyDelete